Managing access to investor queues
- Genevieve Johnson
- ben-rogers
Owners of investor queues can manage who has access to their queues (called "members") with Access Management. Owners may also optionally delegate management of the queue members by assigning the "manager" role. You can login to the access management site with your HawkID here: https://iam.uiowa.edu/access
Adding a member to a queue does not grant them access to the HPC system. In order to use an investor queue on the HPC system, the user must also request an HPC account if they do not already have one.
When a queue member is added in Access Management, it make take up to 2 hours for their access to the queue to begin working.
Overview of roles
Within the Access Management system, each user account is assigned one or more role: member, view, manager, owner. Each role may be assigned to multiple users.
Access & responsibilities of the roles
| Member | Viewer | Manager | Owner | Administrator* | |
|---|---|---|---|---|---|
| Use the queue (must also have an HPC account) | Yes | No | No | No | No |
| View list of queue members | No | Yes | Yes | Yes | Yes |
| Add & remove members from the queue | No | No | Yes | Yes | No |
| Add & remove managers | No | No | No | Yes | Yes |
| Add & remove owners | No | No | No | No | Yes |
| Point of contact for ITS - Research Services | No | No | No | Yes | No |
* The Administrator role is restricted to members of ITS-Research Services for service support.
Depending on the access they need, people may be granted multiple roles. For example, someone may be both a "member" and a "manager" so that they can use the queue and add & remove other members.
Manage members of a queue
- Login to Access Management at https://iam.uiowa.edu/access using your HawkID.
- In the list of Services, click on "Argon HPC Queues" to expand the list of queues you have access to manage.

- Click on the name of the queue you want to manage. Only the queues which you have access to manage will be listed.

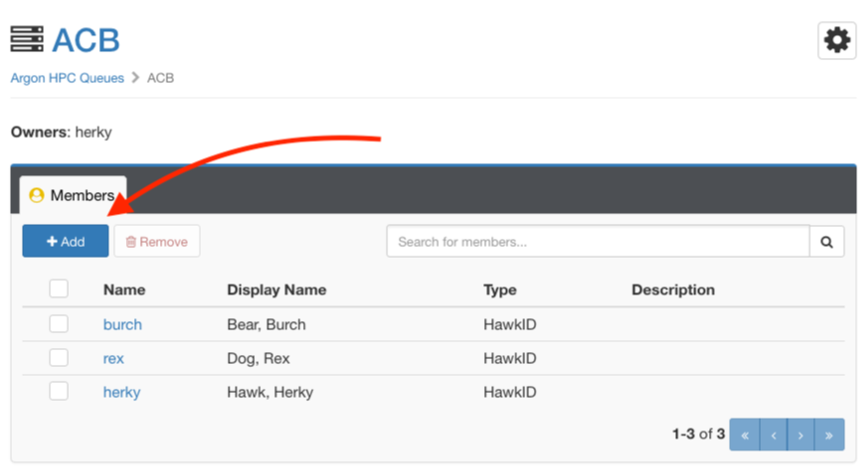
- A listing of users with access to the queue will be displayed on the main page for the queue.

- Optionally click on a username to view details about that user


There may be a delay between when you add a member in Access Management and when they can access the queue.
- If the member has an HPC account: up to 1 hour
- If the member does not have an HPC account: up to 2 hours after their request for an HPC account is approved.
Adding a member to a queue does not also grant them access to the HPC system. In order to use the queue on the HPC system, the user must also request an HPC account (if they do not already have one).
- Login to Access Management at https://iam.uiowa.edu/access using your HawkID.
- In the list of Services, click on "Argon HPC Queues" to expand the list of queues you have access to manage.
- Click on the name of the queue you want to manage. Only the queues which you have access to manage will be listed.
- Click the “Add” button on the Members tab.
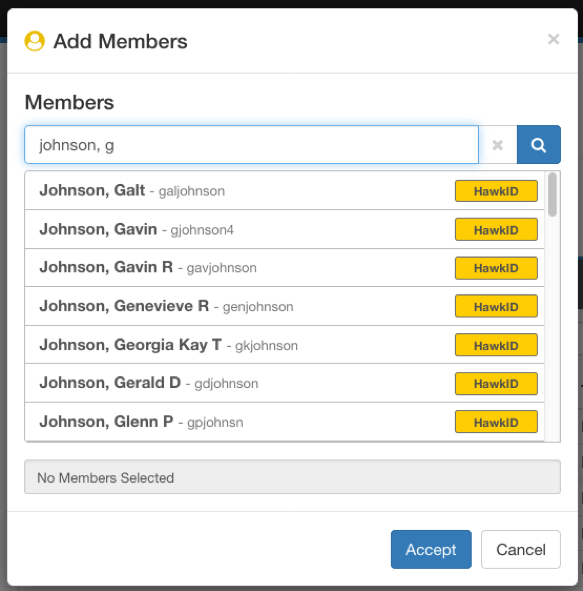
- Search by name or University ID for the member to add and then click on the desired account so that it is listed below the search box.
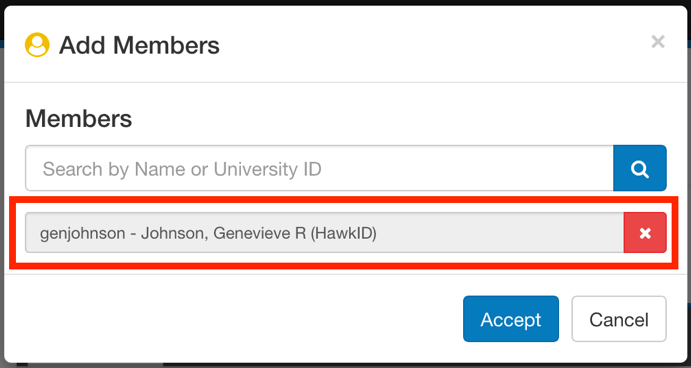
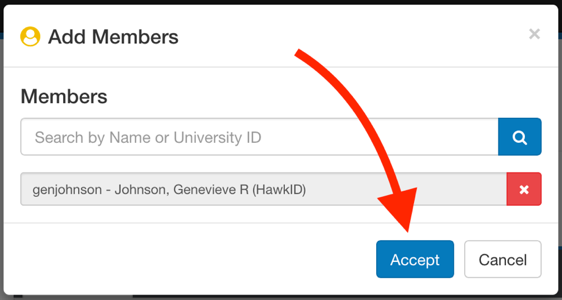
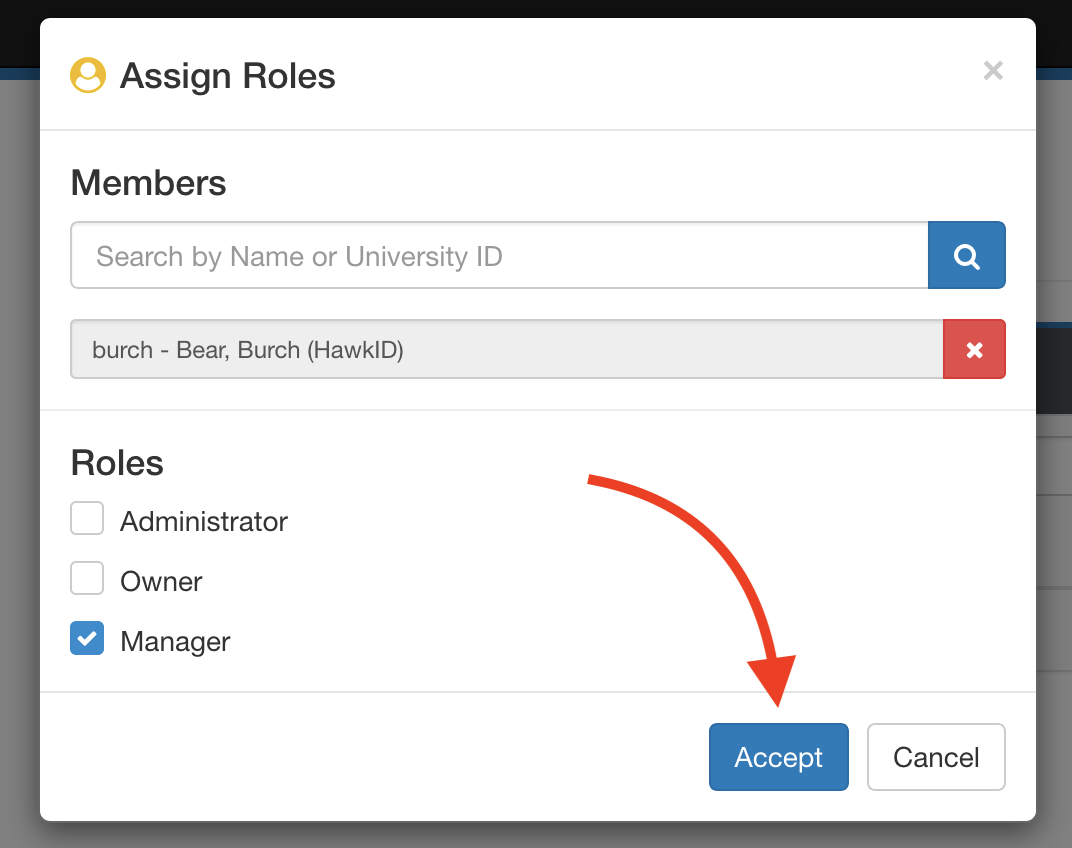
- Repeat step 2 for each member you would like to add and then click “Accept”.
There may be up to a 1 hour delay between when you remove a member in Access Management and when they can no longer access the queue.
Removing a user from a queue in Access Management will not revoke their access to the entire HPC system. If a user you remove from a queue should no longer have access to HPC (e.g., a student no longer in your lab), please contact research-computing@uiowa.edu.
- Login to Access Management at https://iam.uiowa.edu/access using your HawkID.
- In the list of Services, click on "Argon HPC Queues" to expand the list of queues you have access to manage.
- Click on the name of the queue you want to manage. Only the queues which you have access to manage will be listed.
- On the Members tab, check the box in the row of the member(s) to remove.
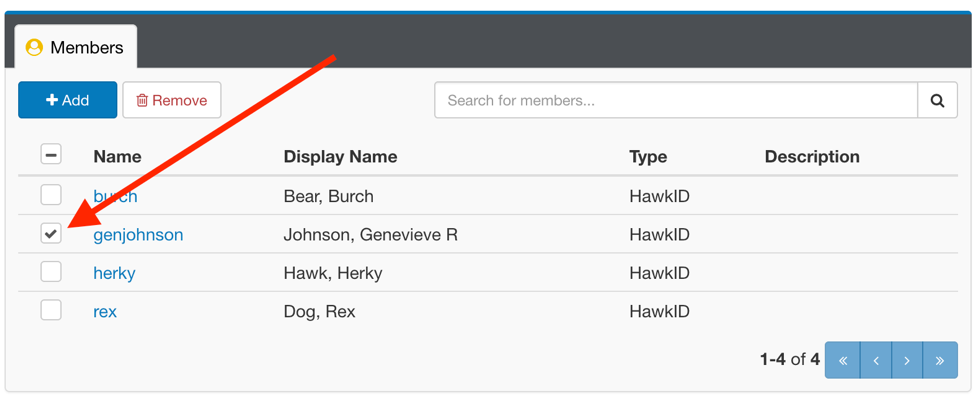
- Click the “Remove” button.
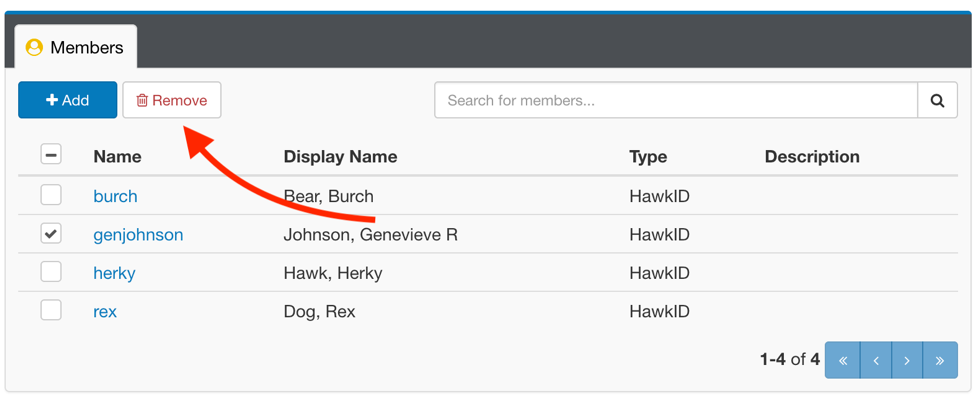
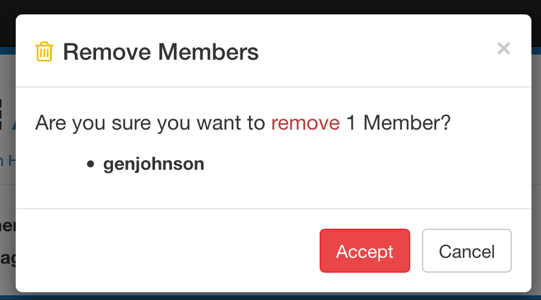
- Click “Accept” to confirm that you want to remove the member(s).
Delegate management of queue members
Owners may optionally delegate management of the queue members by assigning the "manager" and "owner" roles. Changes to queue membership and roles are audited by Access Management.
- Login to Access Management at https://iam.uiowa.edu/access using your HawkID.
- In the list of Services, click on "Argon HPC Queues" to expand the list of queues you have access to manage.
- Click on the name of the queue you want to manage. Only the queues which you have access to manage will be listed.
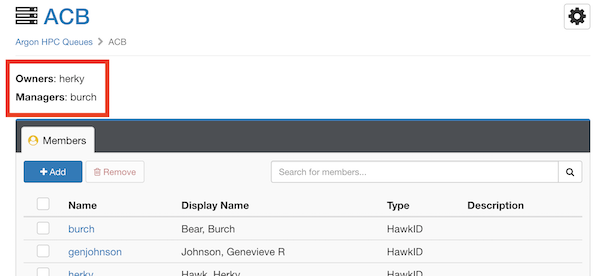
The usernames of owners and managers are listed on the main page for the resource above the list of members.
- Login to Access Management at https://iam.uiowa.edu/access using your HawkID.
- In the list of Services, click on "Argon HPC Queues" to expand the list of queues you have access to manage.
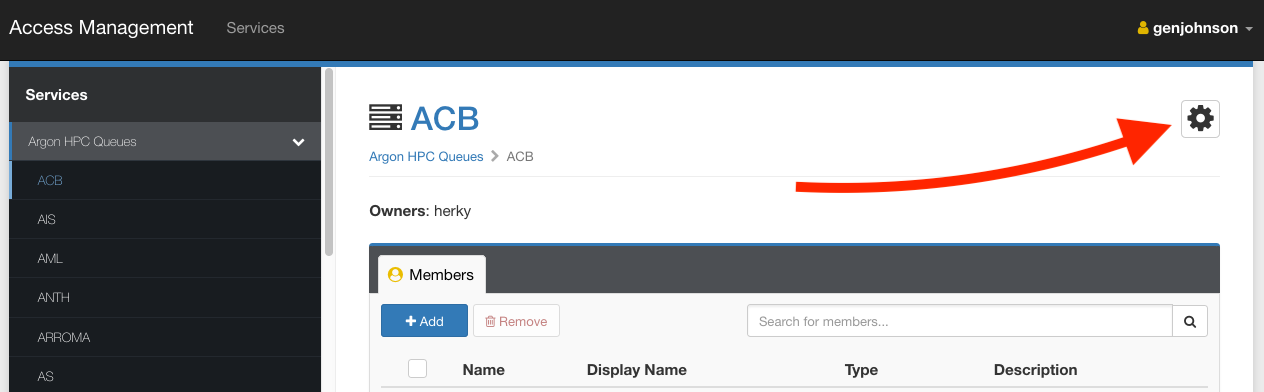
- Click on the name of the queue you want to manage. Only the queues which you have access to manage will be listed.
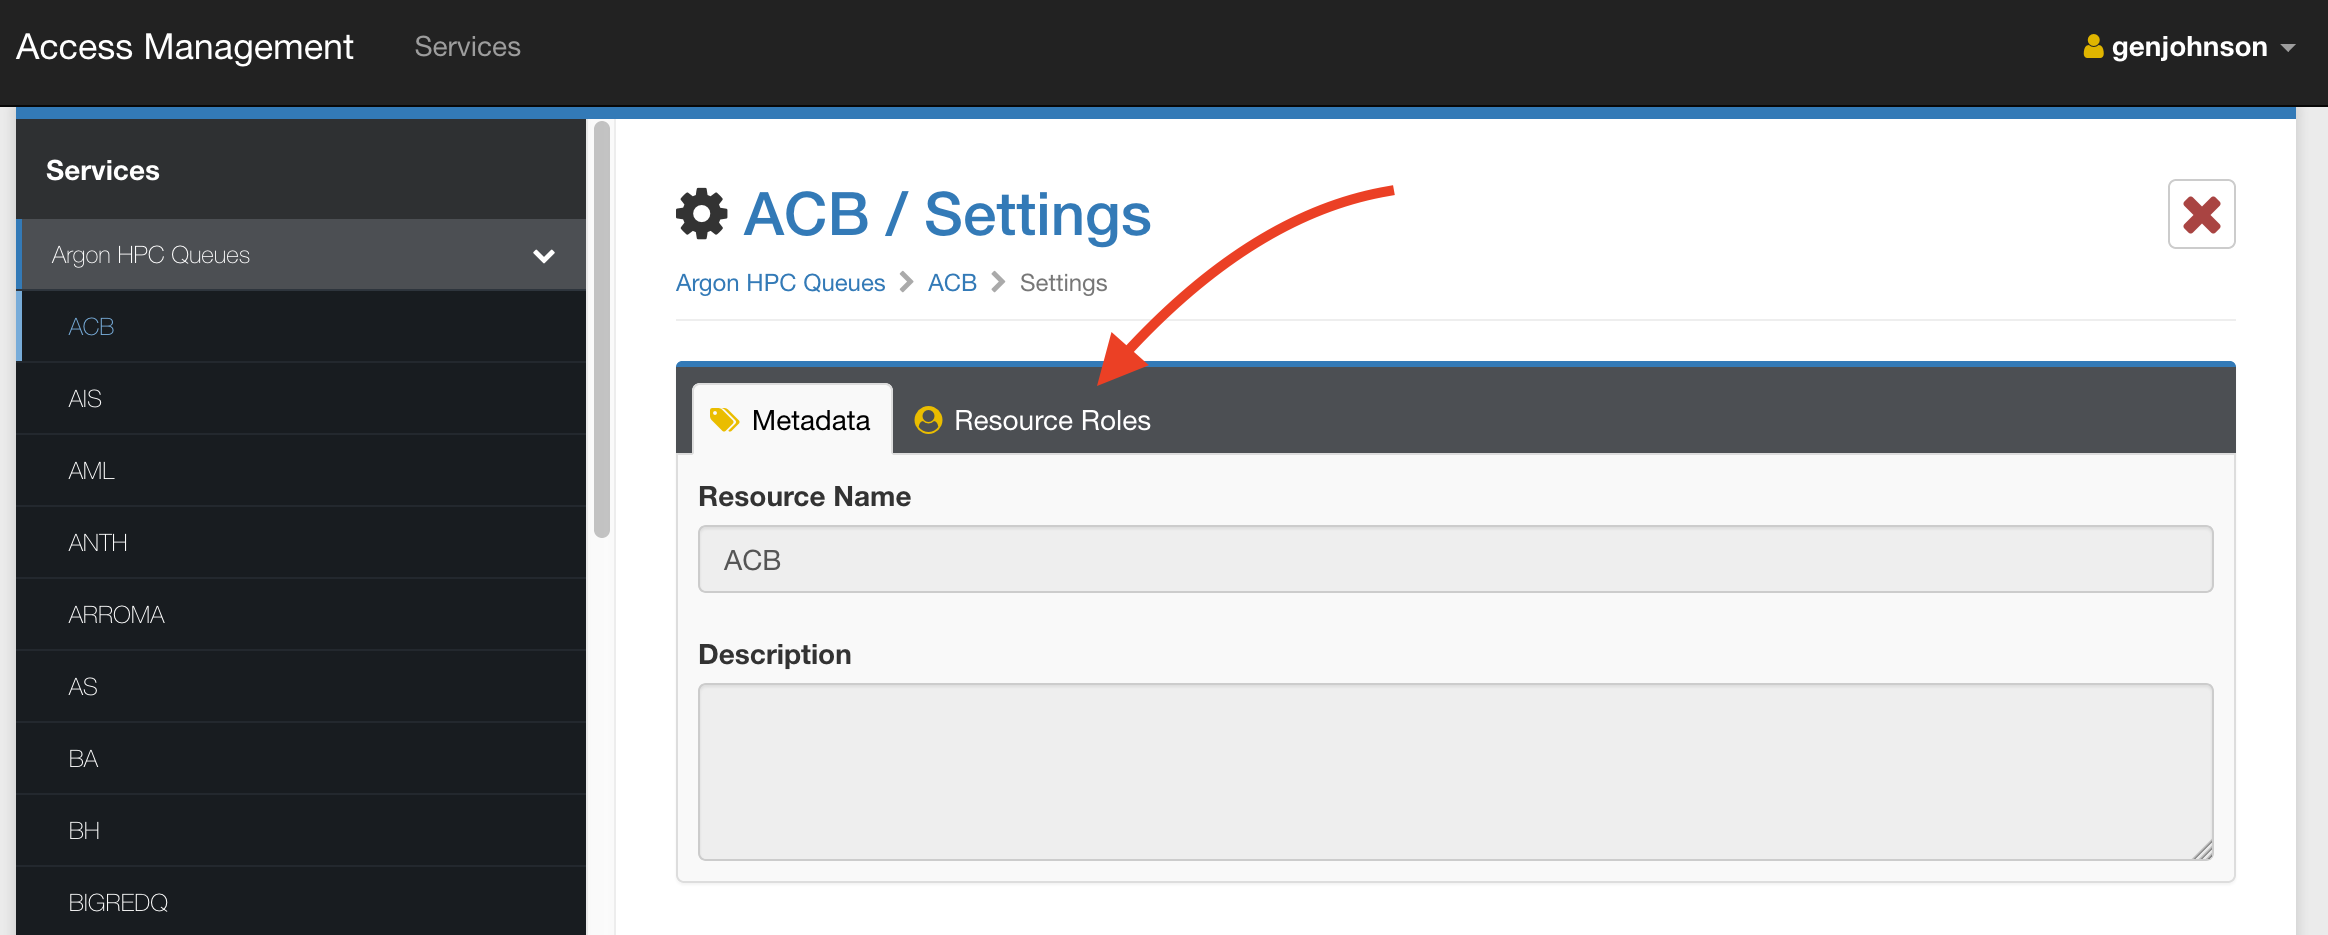
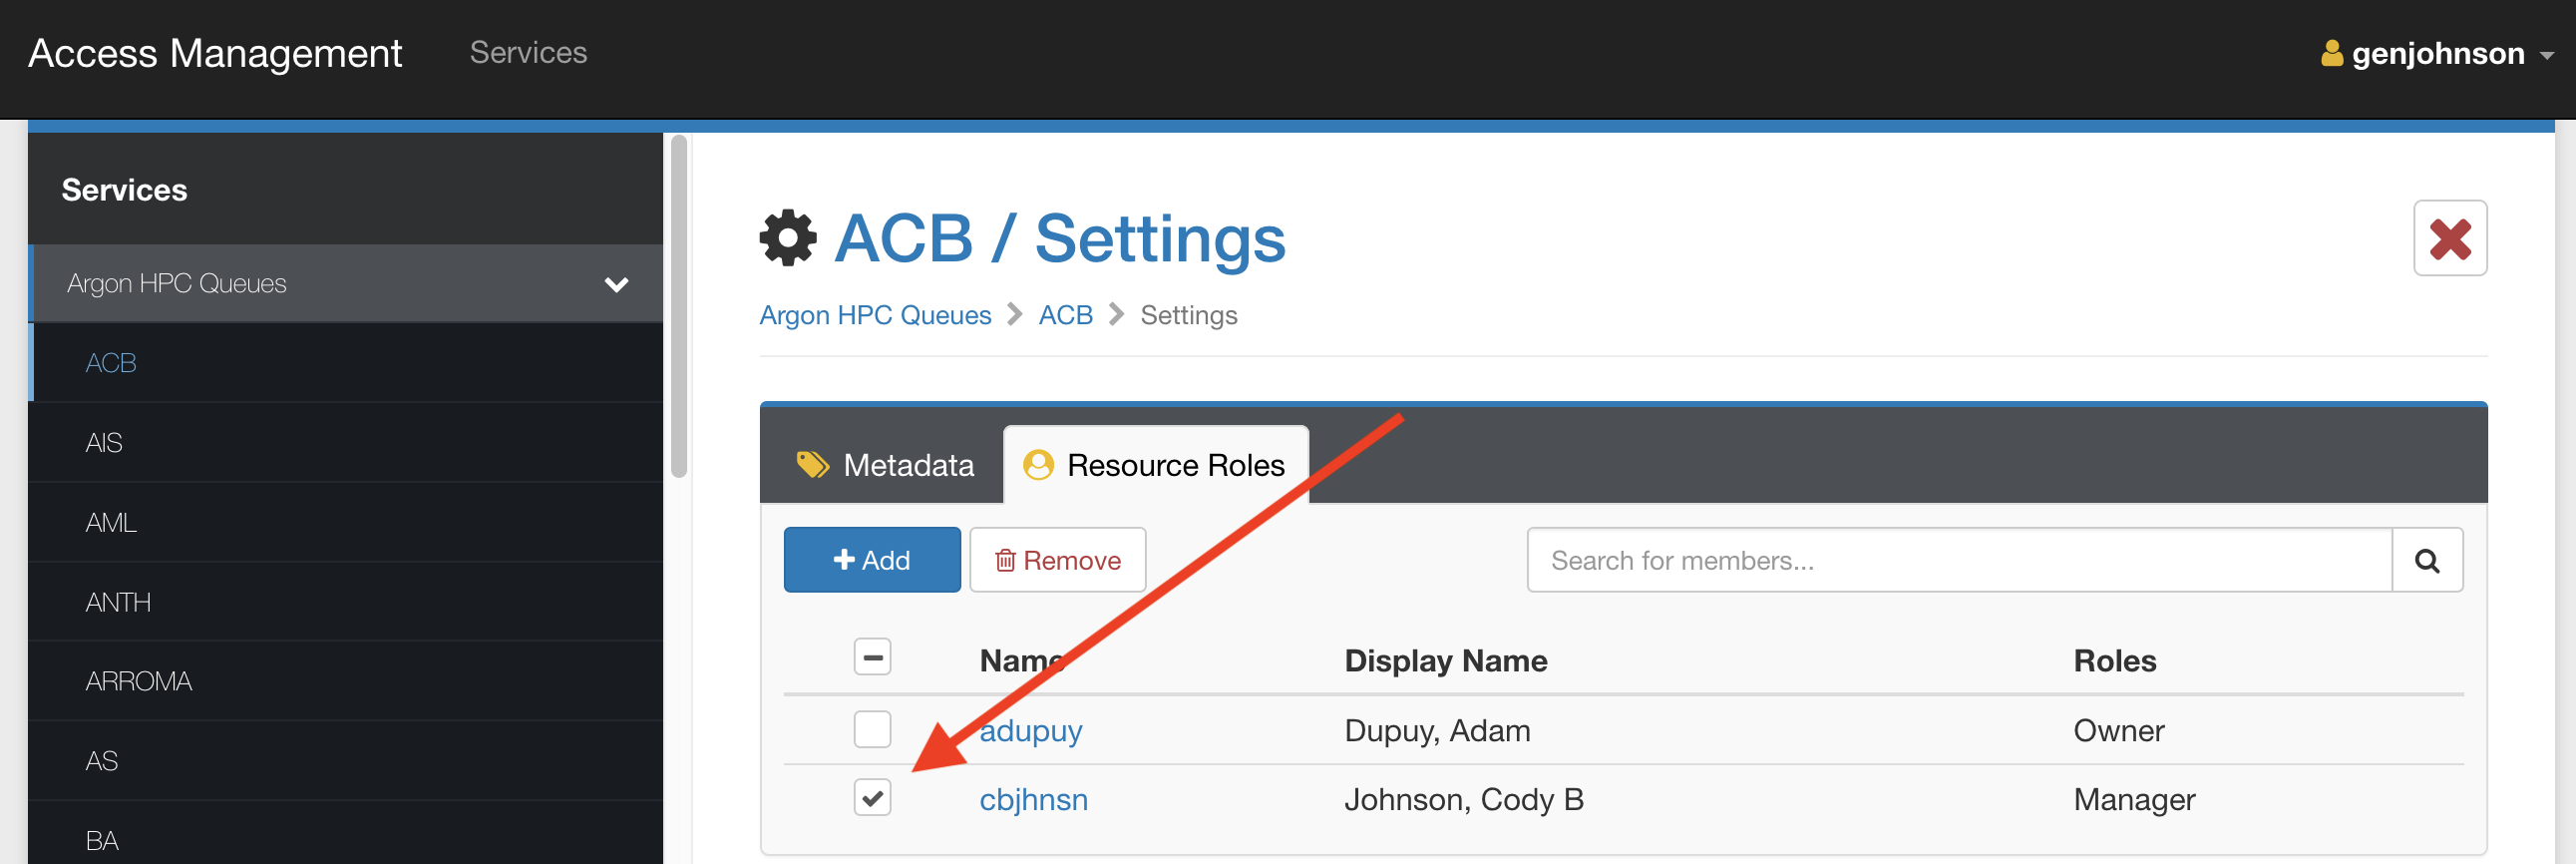
- Click on the cog wheel in the upper right corner to open the settings page for the resource.
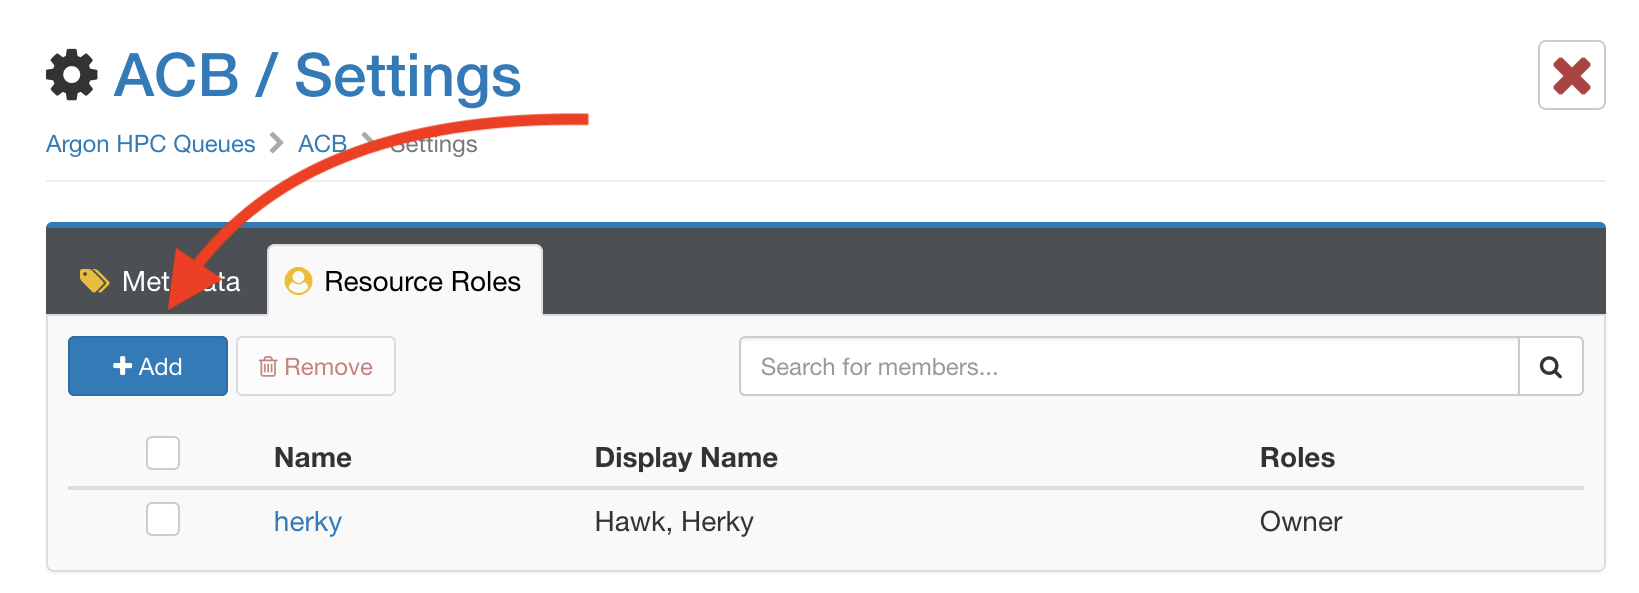
- Click on the “Resource Roles” tab.
- Click the “Add” button.
- Search by name or University ID and then click on the desired account to select it.
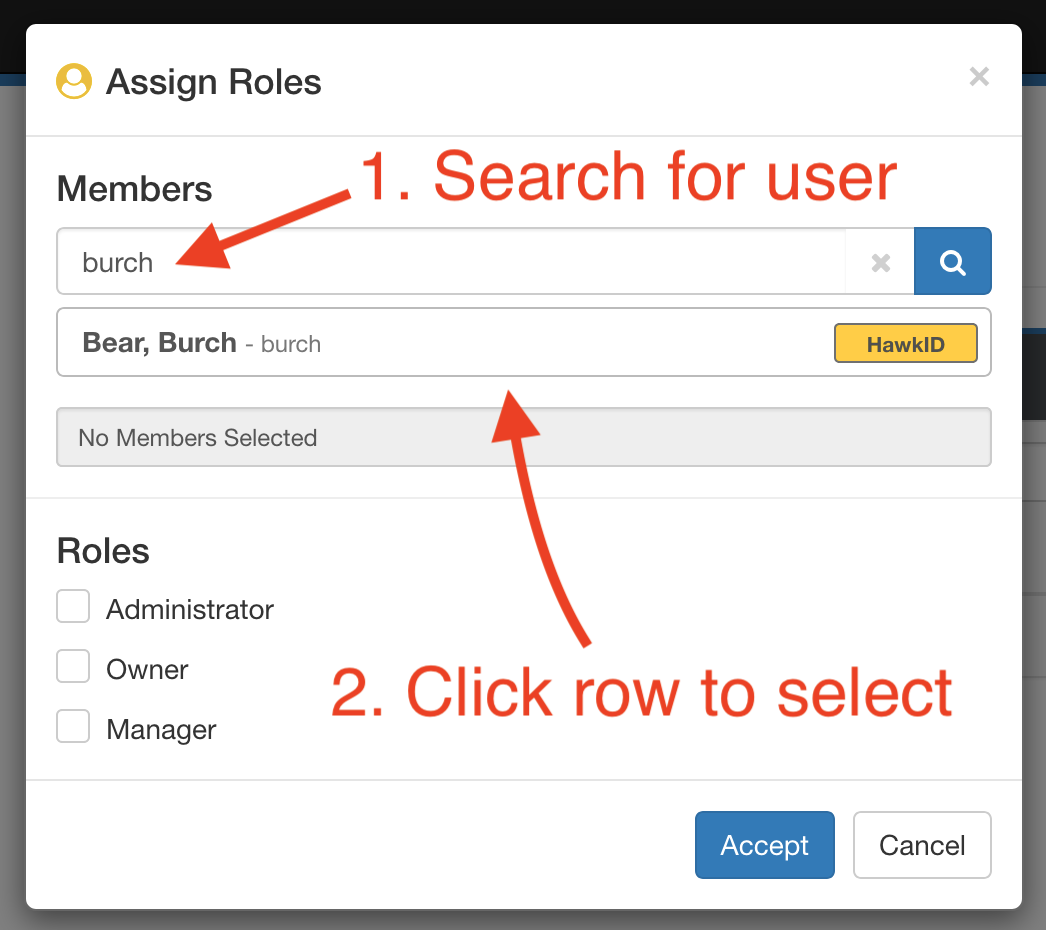
- Check the box for each role to grant to the account.
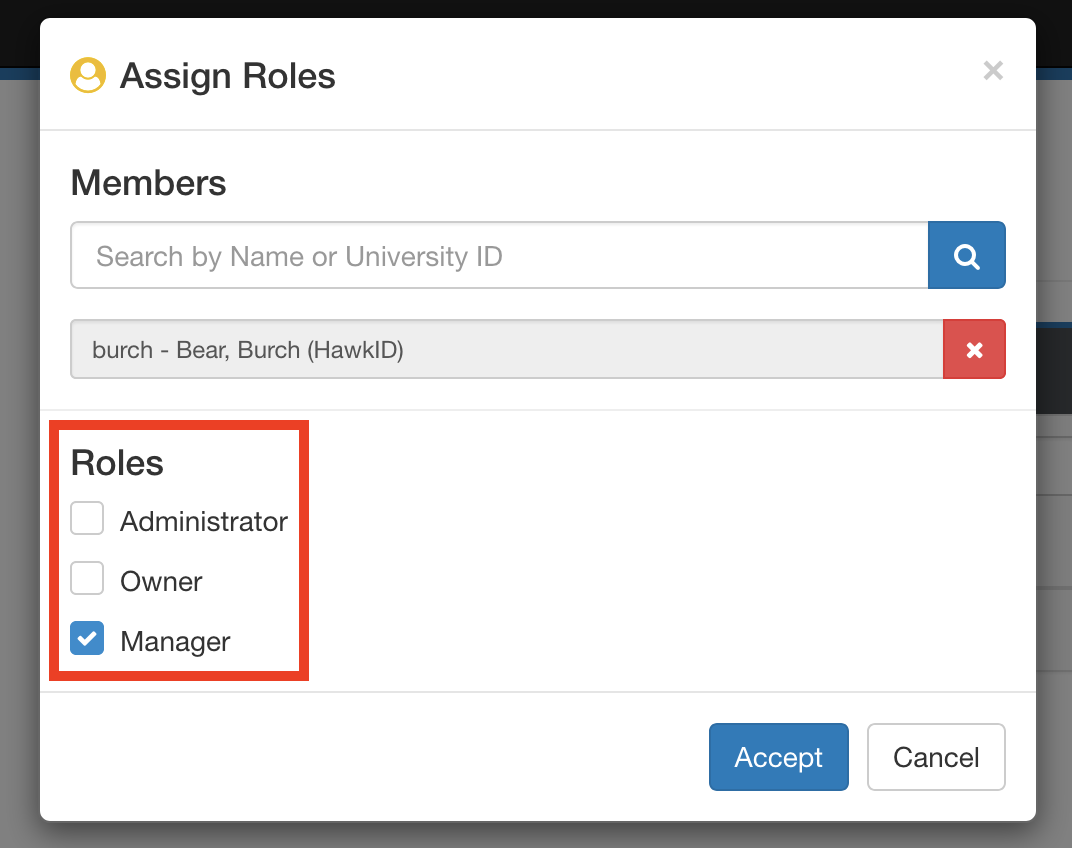
- Click “Accept”.
- Login to Access Management at https://iam.uiowa.edu/access using your HawkID.
- In the list of Services, click on "Argon HPC Queues" to expand the list of queues you have access to manage.
- Click on the name of the queue you want to manage. Only the queues which you have access to manage will be listed.
- Click on the cog wheel in the upper right corner to open the settings page for the resource.
- Click on the “Resource Roles” tab.
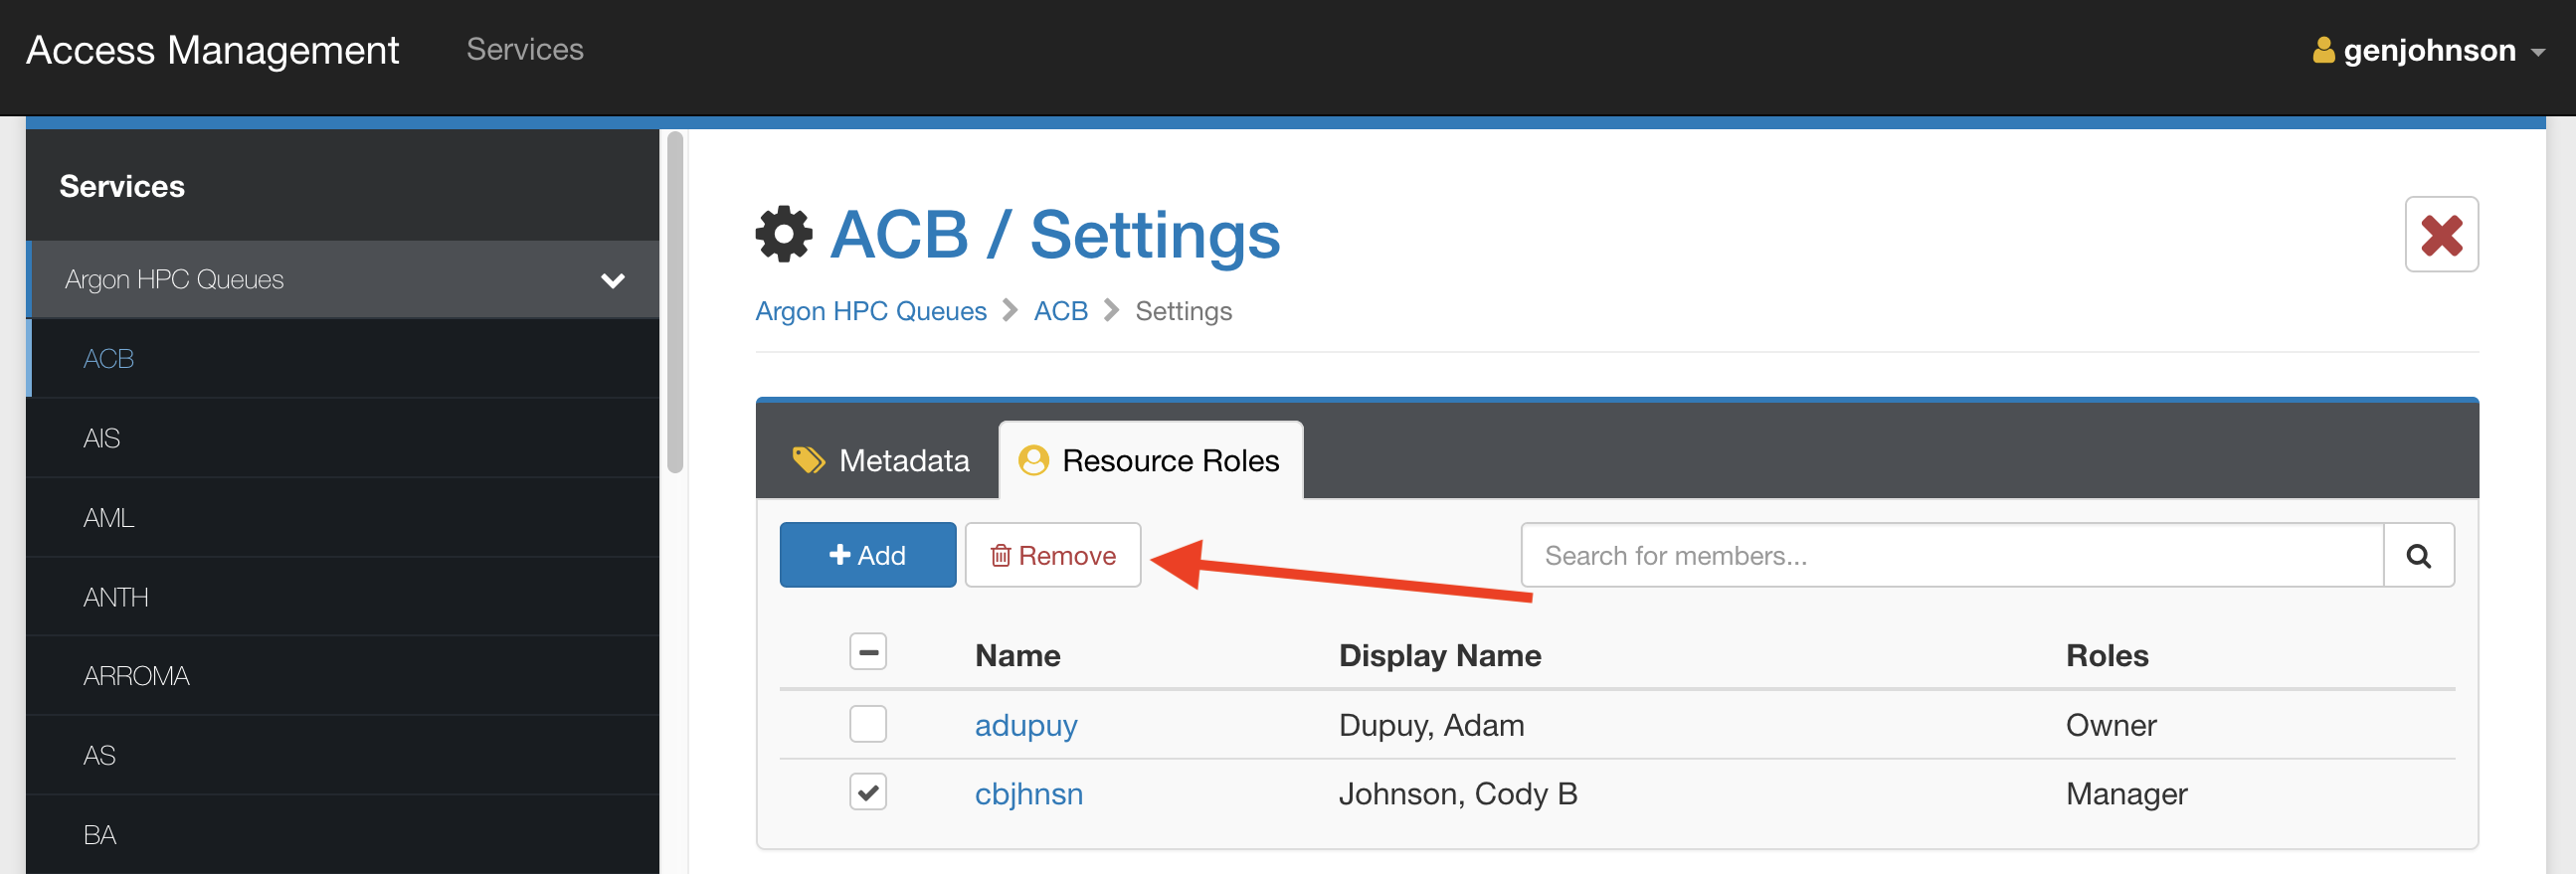
- Check the box in the row of the member(s) to remove.
- Click the “Remove” button.
- Click “Accept” to confirm that you want to remove the member(s).
